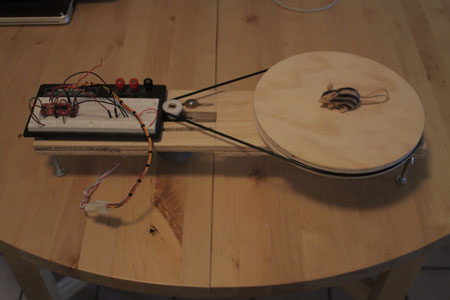
I have wanted to build a rotary turntable for quite a while. With it I can shoot 360 degree product shots, I can set the camera up on it and shoot panoramas. I can use it with my timelapse setup to put motion into a long shot. I also have an idea about trying to use it to build a masterlock picker!

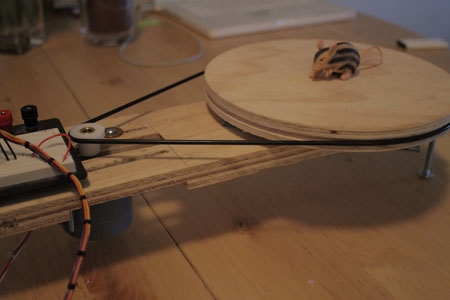
There is a stepper motor connected to a sparkfun easydriver via an arduino (not shown) The motor has something like 1.5 degrees per step and it is geared down heavily via the rubber belt, so it is very precise.

I used a table saw to cut this notch. Not something that I would recommend for the faint of heart. 
Here is the easy driver on the breadboard.

This shot shows the bottom of the board. I used a “lazy susan” bearing from Home Depot to keep the turntable rolling smoothly. One thing I did wrong is that it was mounted several times while I was sanding or grinding and I definitely got a bit of grit in the bearings.

Here is a new thing I have been doing to make adjustable feet. It is a furniture nut pressed into the wood with a 1/4 x 20 bolt and wingnut poking out. It is cheap, adjustable, and keeps me from having to do any more woodworking.

With the easy driver the arduino code couldn’t be easier. I think I based it off of the “blink” example code. You need to enable two pins to set the stepping mode, a pin for direction, and a pin for step. It is that easy. I also have it connected to a converted pc power supply to give the motors 12v. I’m not sure how much I’ll use this, but it has been in my head for forever, so it’s good to let it out!
Hi! this is a very interesting post. We have a blog dedicated to 360 product photography. Would you be interested in making a guest post on our blog (please see the link in the signature)? I would think we can do a simple copy/paste and state that it’s a guest post by you with a link to your original post. What do you think?
Thanks,
Mark
Hi Mark! Definitely, tell me what else you need from me.
Sounds great – thank you! I think we have everything needed to make the guest post. I will confirm here once it’s published.
Hello! Just posted the guest post on our blog. Please see the link in my signature. Thank you.
That’s an awesome setup. My first attempt at an automated turntable was a lot like yours. Same basic parts, lazy susan, stepping wheel and a motor. For the timing unit, I used what I had laying around the basement, a digital enlarging timer. It worked well enough for the time.
What I finally ended up using (in current use) is a modified milling station or my homemade bearing plate for large or really heavy items.
Great tutorial nonetheless.
This is a wonderful post. Would you be willing to list out with pieces (ie, motor, etc) you used? I’m about to start some structured light 3d scanning. I have the code needed to run the arduino for the scanning and movement of the turntabled, but was looking for a belt driven solution like yours. Thanks in advance.
Greg K.